Data management
Ingestion modes
There are several ingestion modes available to the user:
| Ingestion mode | Description |
|---|---|
Drag’n’Drop |
Let you drop a file from your local filesystem |
SFTP transfer |
Let you transfer through SFTP any files from external filesystem to Allonia platform |
Database connectors |
Let you create a database connection that any user of your workspace will be able to use without knowing the credentials |
Datasources supported
Files supported by drag’n’drop:
| Data type | Extensions authorized |
|---|---|
Text |
*.csv, *.txt, *.json, *.log |
Image |
Not supported yet |
Video |
Not supported yet |
Sound |
Not supported yet |
Files supported by sftp:
| Data type | Extensions authorized |
|---|---|
Text |
All |
Image |
All |
Video |
All |
Sound |
All |
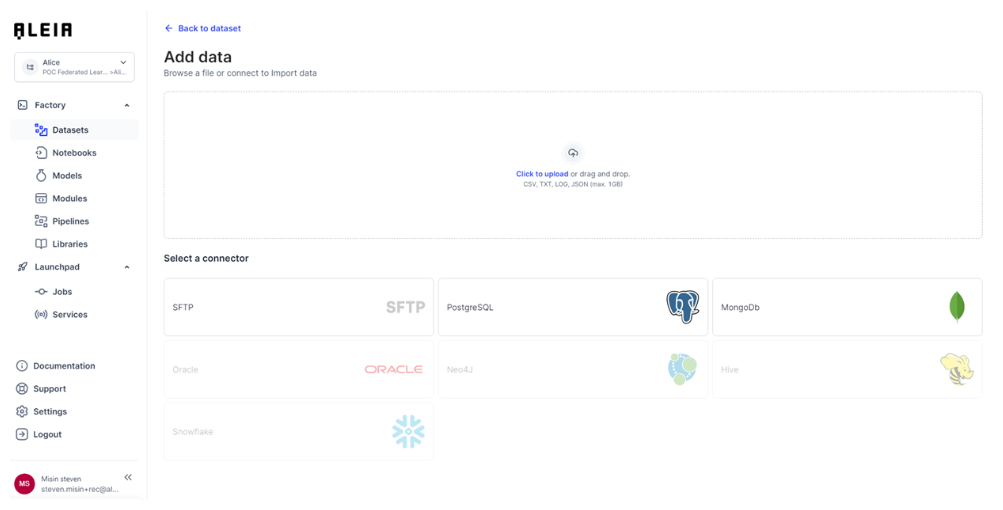
Data connection & upload
All data ingestion options are available in the user workspace, with the “Import new data” action accessible from the workspace.
This action will show you the data upload homepage where you will be able to choose between various options to make data available in the platform:
-
Direct file upload
-
File transfer through SFTP
-
Database connection
Drag’n’Drop
The “drag’n’drop” feature aim to provide a simple and fast way to add new data in a project/track. Please note that for big sized files (>1Gb), the recommendation is to use the “SFTP Transfer” feature (see after).
Step 1: Choose a file from local storage or drag and drop
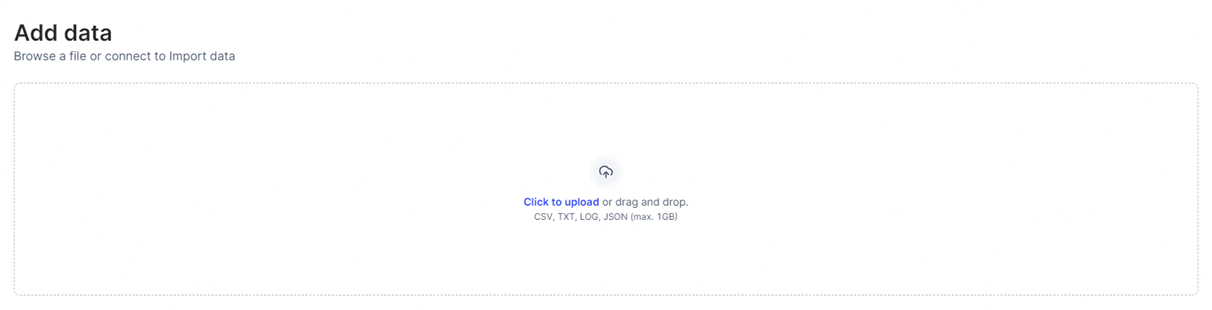
Step 2: (CSV case) Choose a delimiter and import file

Result : File will be imported into the track of your project, and made available to “datasets” view.
SFTP transfer
The "SFTP Transfer" feature aims to provide a more robust way to add new data in a project/track, to serve automation purpose and big sized files loading.
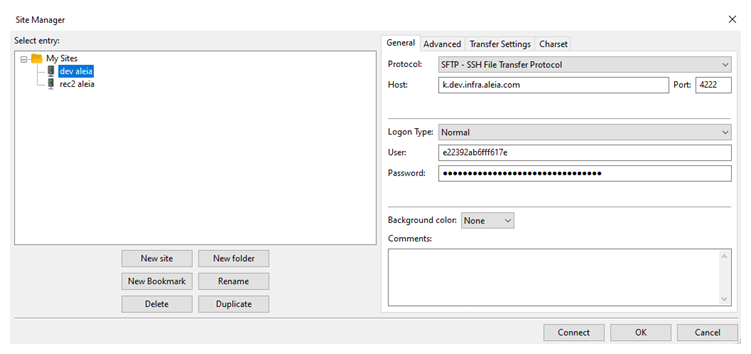
Step 1: Get the SFTP access information
Before being able to transfer files to the platform, the user needs to get all access information’s that will allow him to push files from outside the platform, to a project/track inside the platform.
These information’s are available through the view workspace/data ingestion in the “SFTP Transfer” panel.
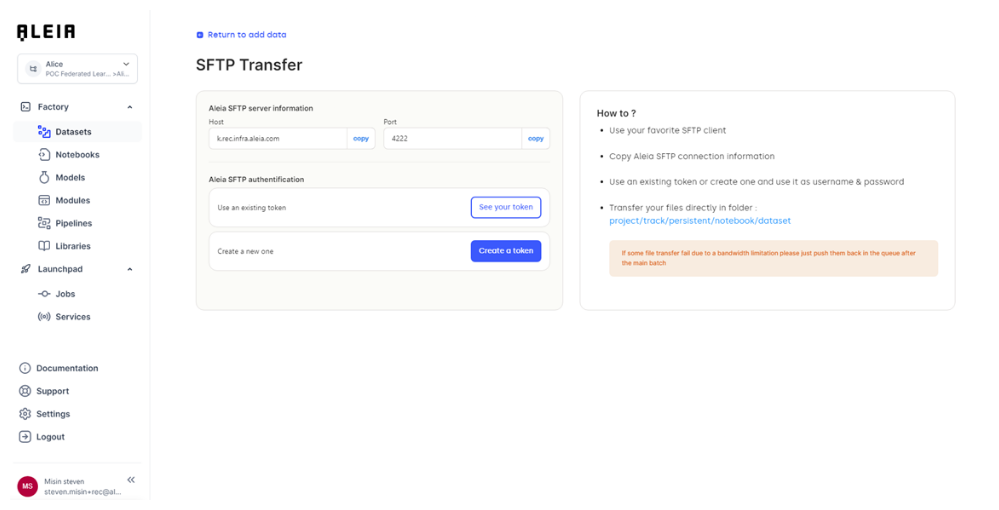
There are 2 types of information’s that will let you use the SFTP transfer:
-
Allonia SFTP server information
-
Protocol: Protocol that will be used through the transfer
-
Host: the hostname of the targeted environment
-
Port: the port of the host
-
-
Allonia SFTP authentication
-
Tokens are user related, and represent the credentials that will be needed to use platform services from outside
-
Tokens can be managed in the user “My account/Access tokens” page. The user will be able to create tokens or revoke existing ones
-
Step 2: Transfer the file via SFTP
The transfer can be done through different tools as it will use the SFTP transfer protocol. The SFTP transfer will need authentication information’s that are available on the “SFTP transfer” page, where you will be able to create tokens that will be used as username/password credentials.
The following example will be done with a SFTP client, but it can be done inside a scheduled computing process.
Configure the SFTP connection with information from SFTP Panel:
Once connected, you can navigate through the projects and tracks you are authorized, and once you are in the wanted track, you can upload files that will be available through the UI and your jupyter notebook.
You will need to upload precisely in intended “dataset” folder as its path will be the following:
/<Your project>/<Your track>/<persistent bucket for track>/notebooks/dataset/
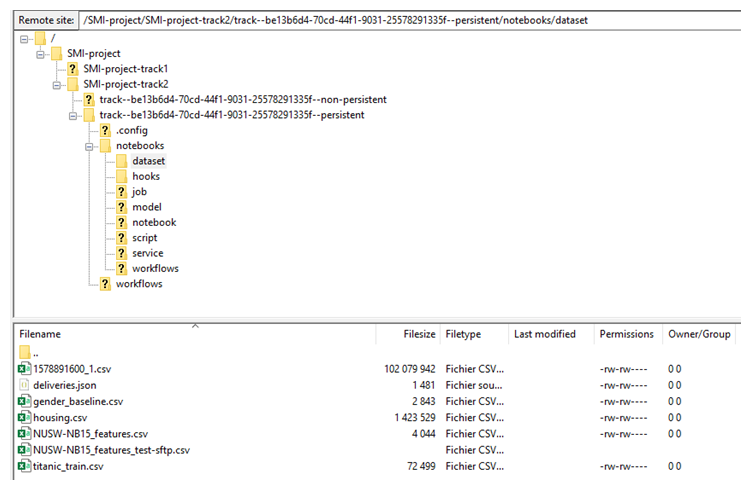
You can manage these actions through SFTP inside your workspace:
-
Load/Download files
-
Create/Rename/Delete directories
Database connectors
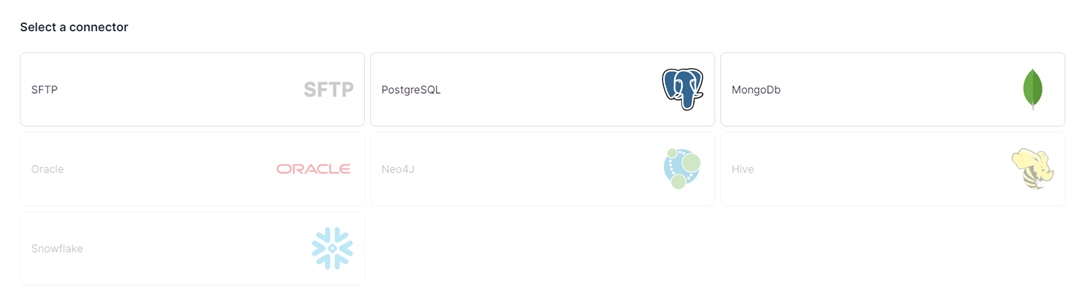
Various db type are available through the connector catalog. We continuously work to add more connectors, so stay up to date to be able use the last ones.
Database connectors available:
| Database connector | Available |
|---|---|
PostgreSQL |
Yes |
Mongodb |
Yes |
Oracle |
Soon |
Neo4J |
Soon |
Hive |
Soon |
Snowflake |
Soon |
Create & configure db connectors
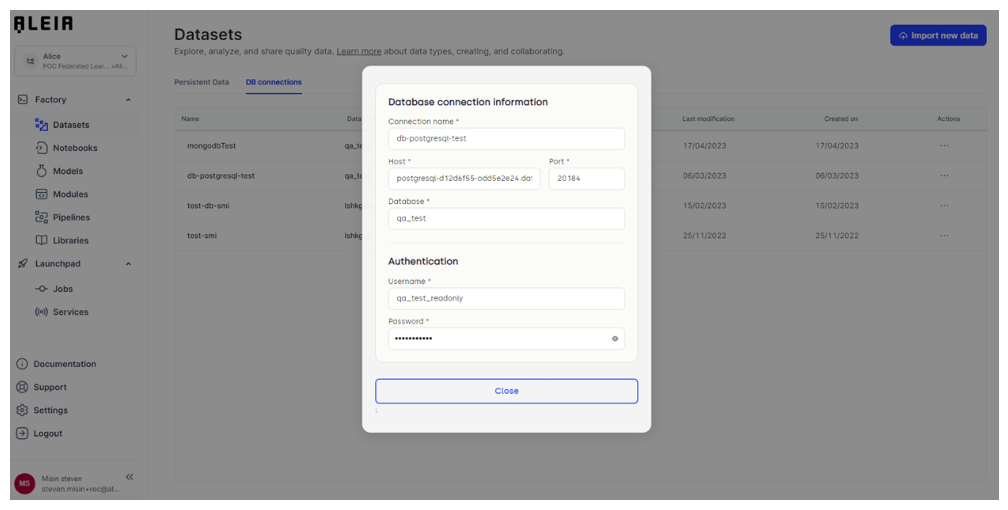
Selecting one will let you configure the connection to an existing database:
PostgreSQL example:
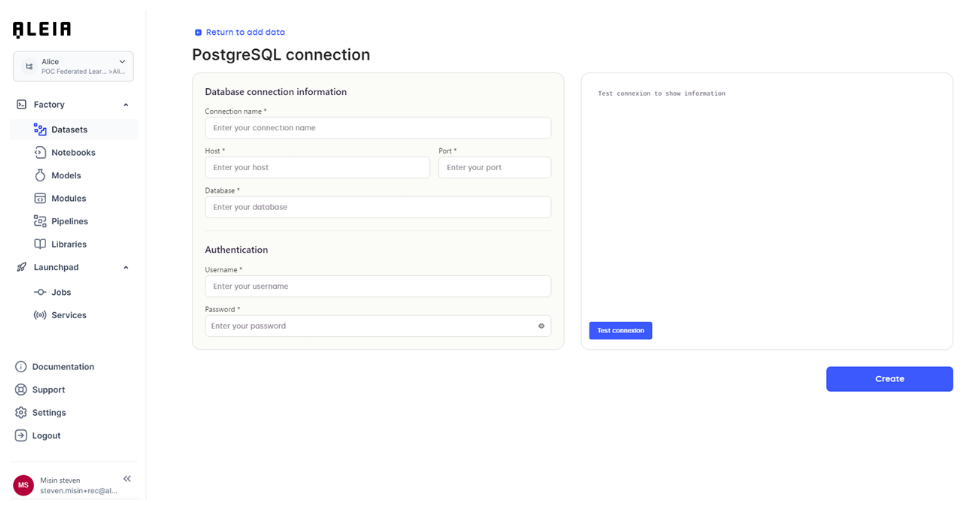
This screen will let you type the various connection information of an existing db. When all fields are completed, you will be able to save the db connection in the platform.
Newly saved db connections will be available through the workspace in the “data” screen and dedicated “db connections” panel:
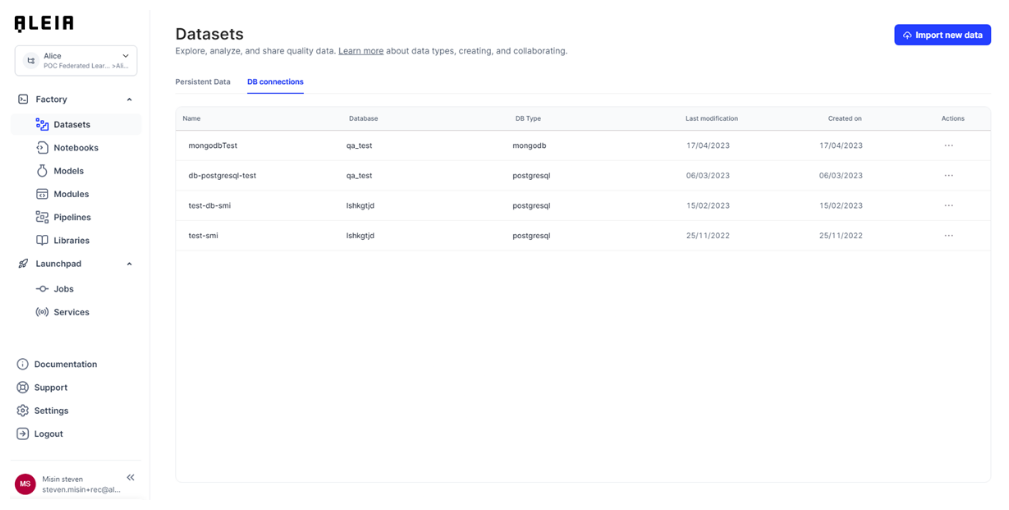
From there, you will be able to:
-
View your db connection information
-
Update your db connection information
-
Delete your db connection
Db connection details & update:
Use db connectors
The aleialib db package will let you connect to an existing database, and let you do custom requests. You will be able to request it from any Python code: notebooks, modules, user-services.
|
You can check for further information about how to use db connectors in related section here. |
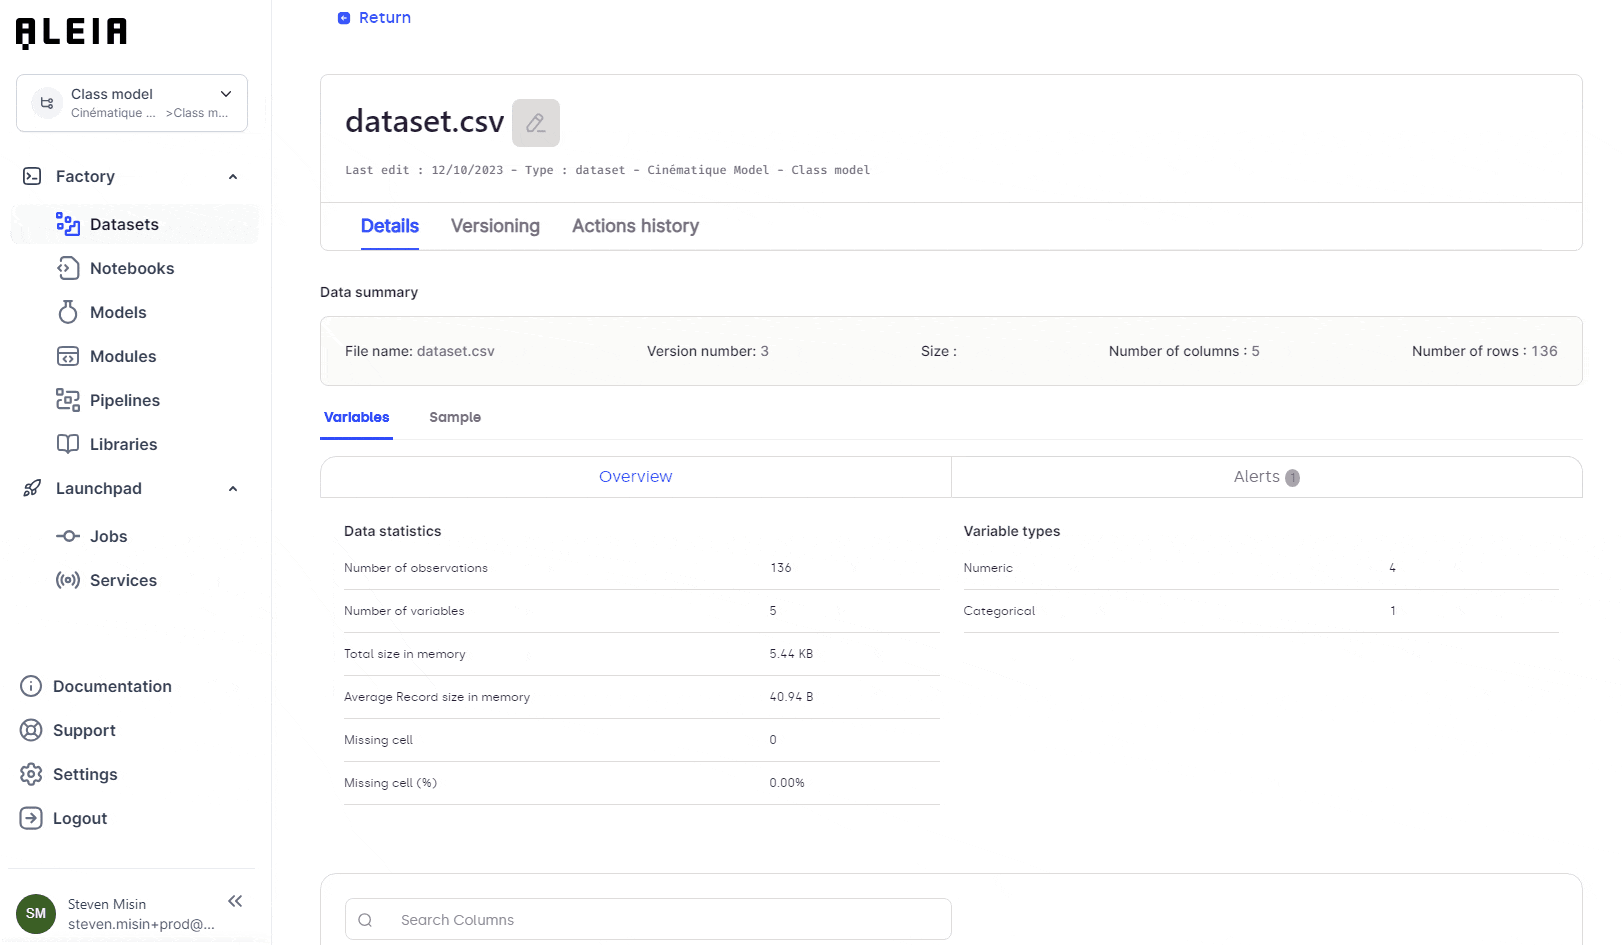
Data profiling
For any structured datasets imported or created on the platform, an automated analysis will be run and made available to let you understand the data content.
These formats are currently supported for automated dataprofiling:
-
Files with delimiters
Either the file is imported through the local import, SFTP, S3, or created through code on the platform, you will be provided with these informations:
-
Overall statistics (number of observations, variables, memory per record, percentage of missing values)
-
Alerts (high cardinality, missing values, skews, and more …)
-
Detailed analysis on each variable with statistics and charts
-
Sample of the data