Real-time serving
Allonia is providing 2 distincts types of service to provide real-time serving through APIs:
-
Model services: services through the "Deploy" action available for specific "Allonia model". See dedicated section for more information about "Allonia model" here
-
Custom services: service as default python template that let any users create quickly Flask applications
Both existing services types are available through the related section "Services" on the "Launchpad" menu.
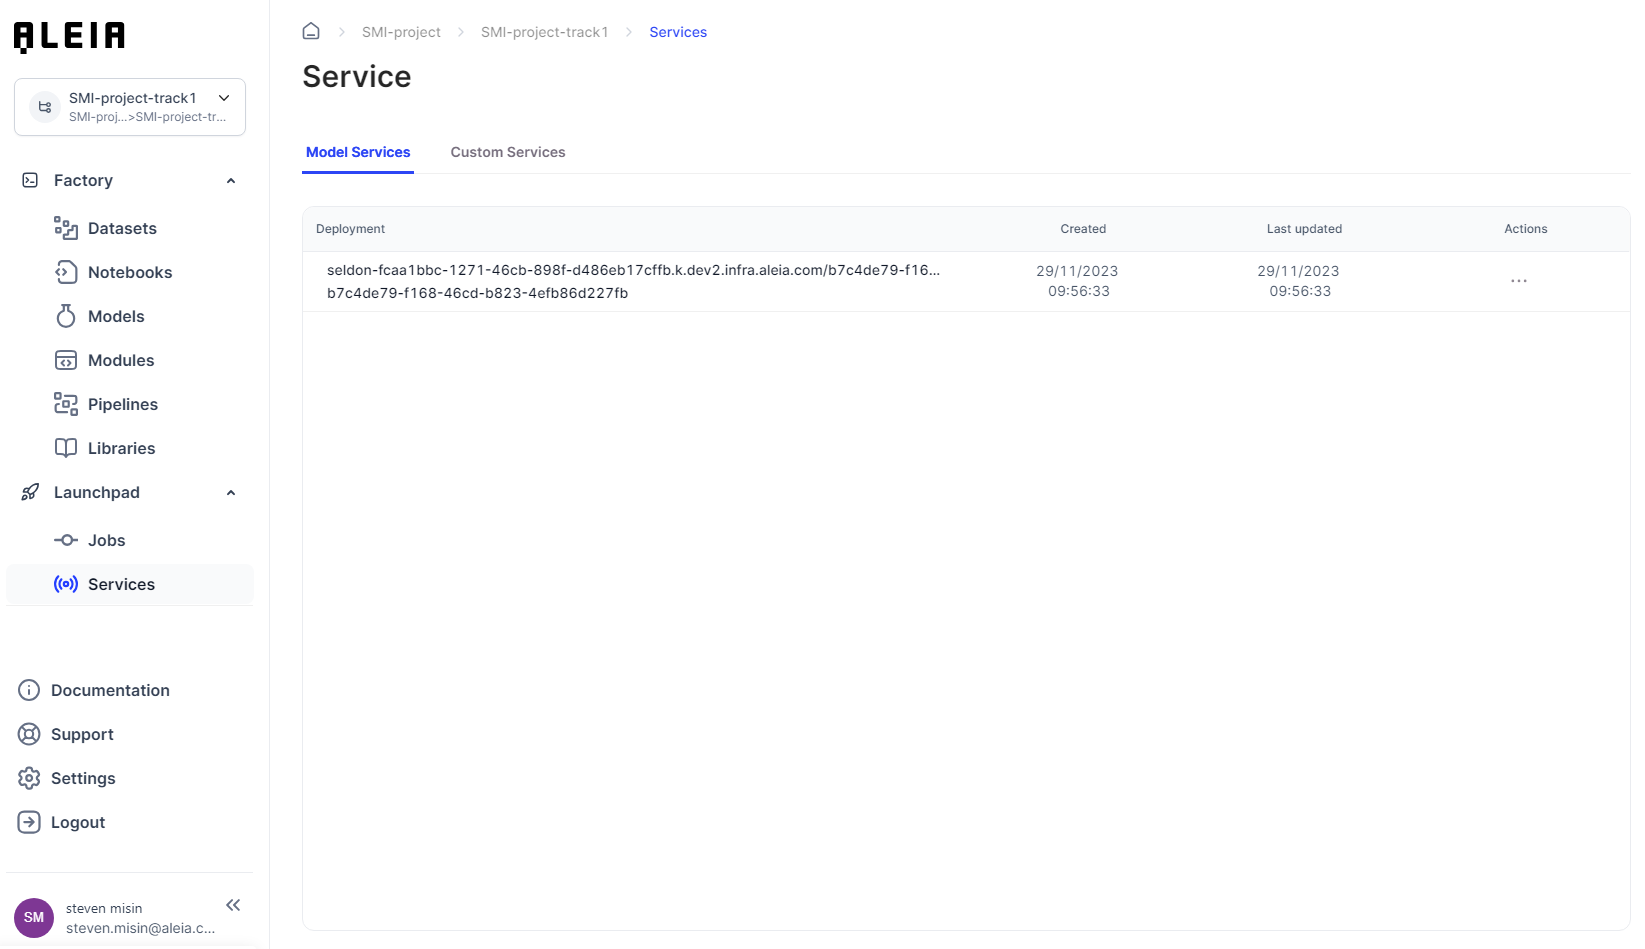
Model services:
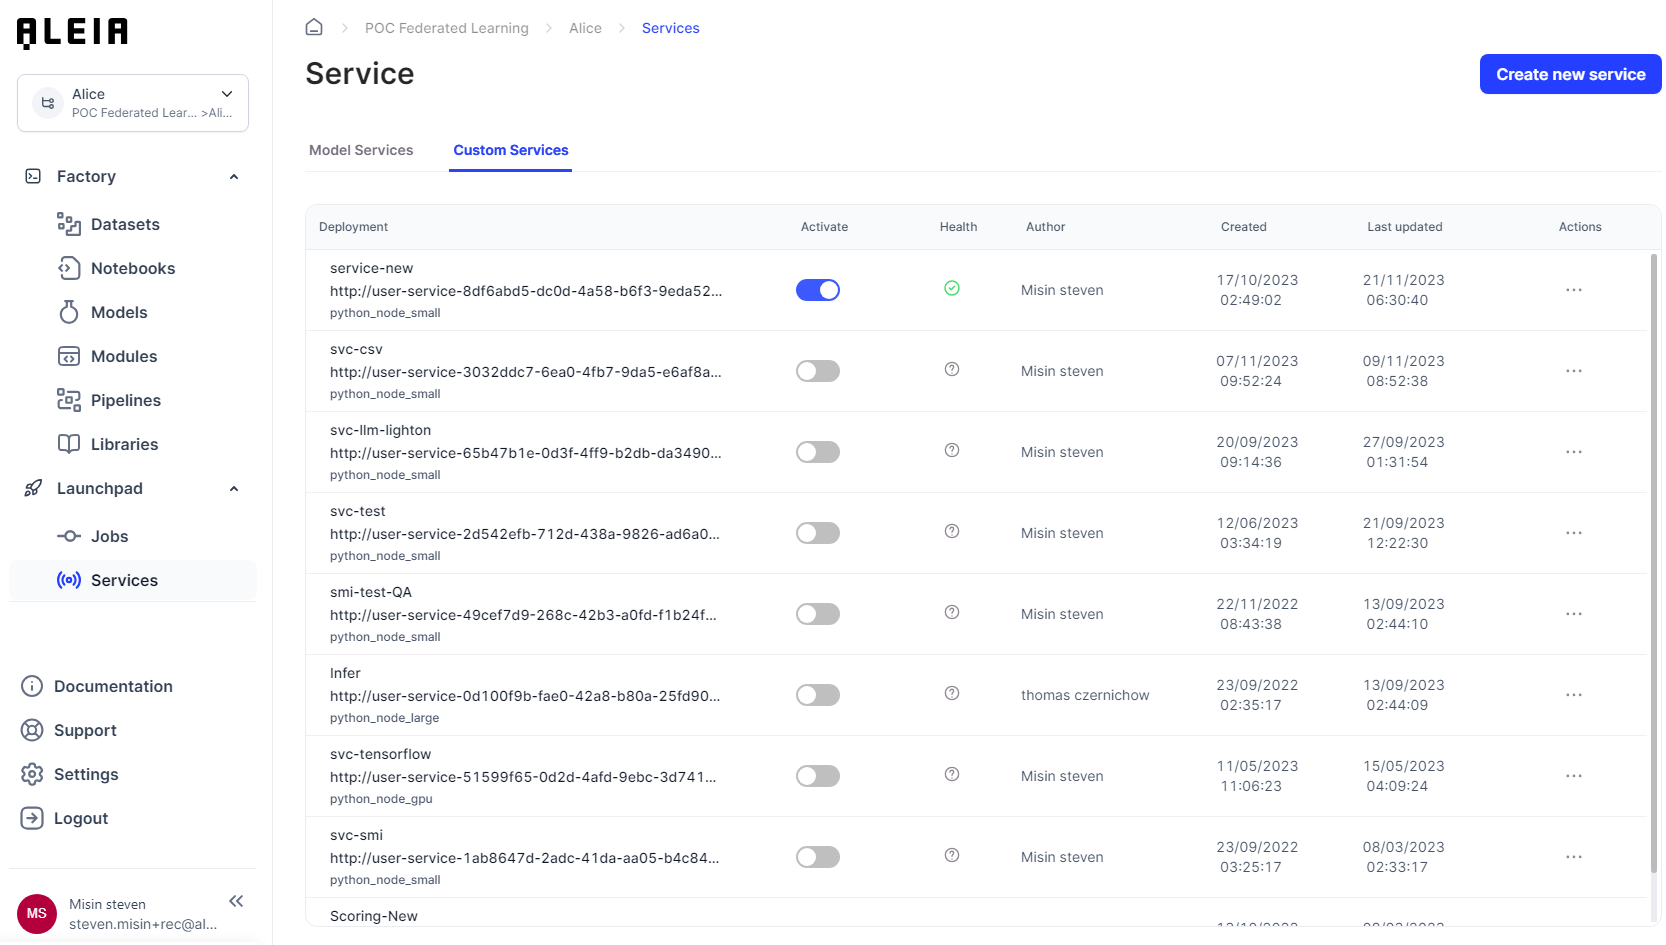
Custom services:
Manage model and custom services environment
We aim to provide a flexibility around resources that you could use with for your model and custom services.
Each model or custom service you created can be configured to use a specific computing environment.
Here are the detailed computing ressources specifications for modules:
| Computing environment | CPU core | Memory (GB) | GPU Core | GPU memory (GB) |
|---|---|---|---|---|
Node small |
1 |
4 |
0 |
0 |
Node large |
4 |
16 |
0 |
0 |
Node gpu |
8 |
40 |
1 (P100) |
16 |
Real-time serving with model-services
Model services are APIs that automatically encapsulte a chosen Allonia Model. Users will be able to manage only the model service configuration.
Create and configure a service
As Model services already encapsulate a chosen model and expose its predict function, you won’t need to edit any code.
Model services are created directly from the dedicated Model section here
Use a service
Model services are deployed with 2 endpoints:
-
Predict function of the model : /api/v1.0/health/status/
-
Healthcheck of the service : /api/v1.0/predict/
Both endpoints are available to call following the URL the service has been deployed you can found of the "Model services" list.
Model service example:
As the deployment is:
http://user-service-a0b77cb9-b5a5-4cda-92ea-48847aa8c33e.fcaa1bbc-1271-46cb-898f-d486eb17cffb/user-services/invoke/a0b77cb9-b5a5-4cda-92ea-48847aa8c33e
The full URL for the predict endpoint will be:
http://user-service-a0b77cb9-b5a5-4cda-92ea-48847aa8c33e.fcaa1bbc-1271-46cb-898f-d486eb17cffb/user-services/invoke/a0b77cb9-b5a5-4cda-92ea-48847aa8c33e/api/v1.0/predict/
Real-time serving with custom-services
Custom services are simply APIs that every user on the Allonia platform can create and manage. It can encapsulate any python code and aims to provide a reliable and easy way to do data processing and model-serving in real-time.
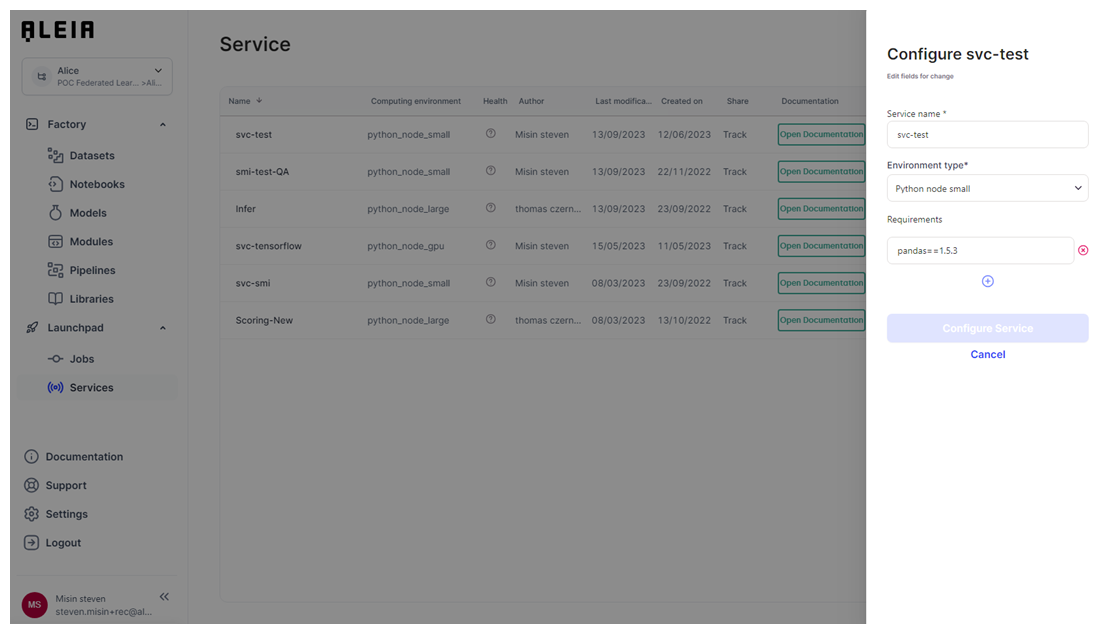
Create and configure a service
By creating a service, you will be able to choose a dedicated environment type that let you choose between cpu or gpu, and computing size.
Also, you will be able to set up the list of packages that will be the only ones installed for this custom service, letting you avoid getting all libraries installed for the track in Allonia Python Package Management view to be installed in the deployment.
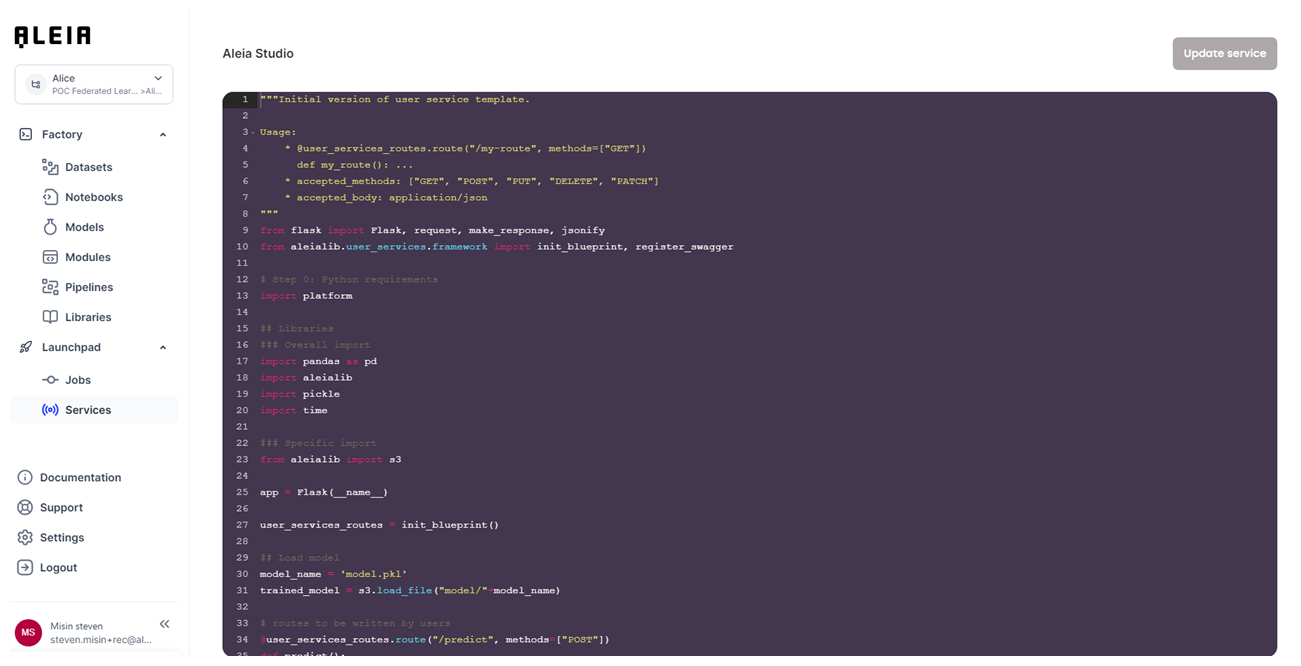
Services will be created by default using a pre-defined python code template. The service will be set on “Disabled” by default, so you will have to change this through the service management.
Edit a service code
Services will be created using default template (it is disabled by default). You will have to change that setting before letting other users use it.
You will be able to change the service python code directly through the Allonia’s editor when choosing the “Edit” action.
Deploy a service
Services can be deployed and undeployed in 1 click with the dedicated slider. It could take time between the status change and the effective end of the deployment, depending mostly on the number of libraries setup in the track with the Python package management.
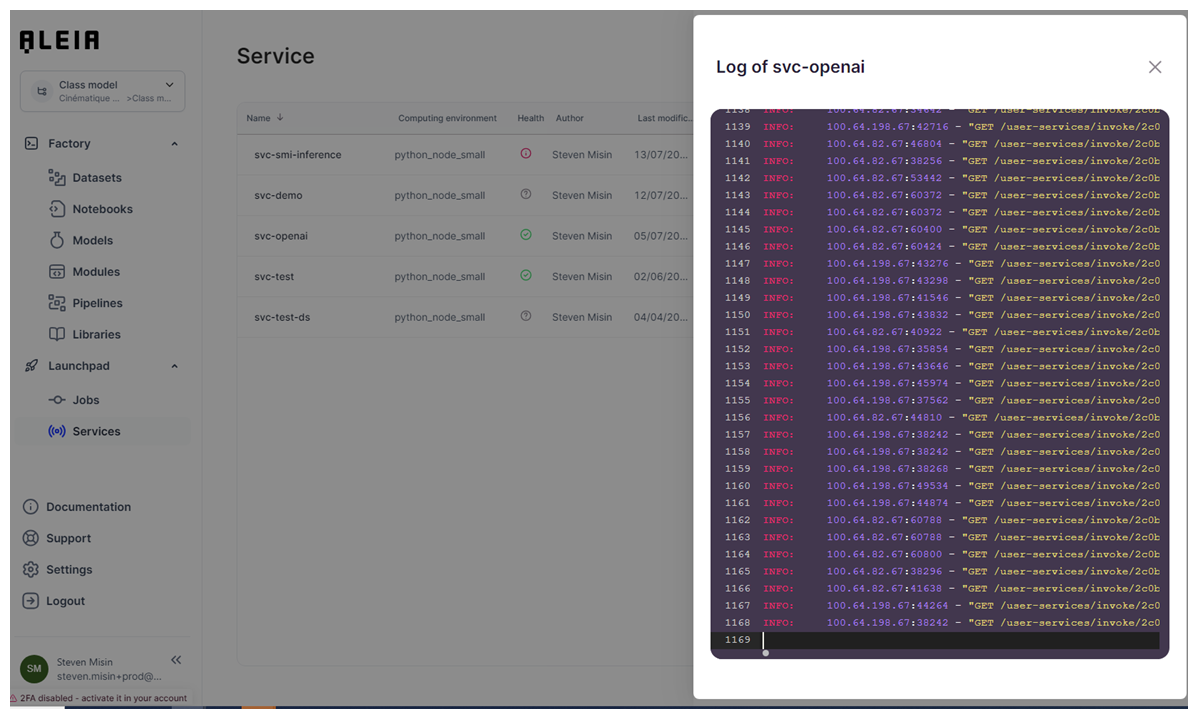
You will be able to track the deployment progress through the "View logs" section for the custom service.

Use a service
Once the service is correctly configured and enabled, you will be able to use it thanks to dedicated integration examples for a given service available by action “Integrate service”.
From within the platform using Aleialib pre-defined functions:
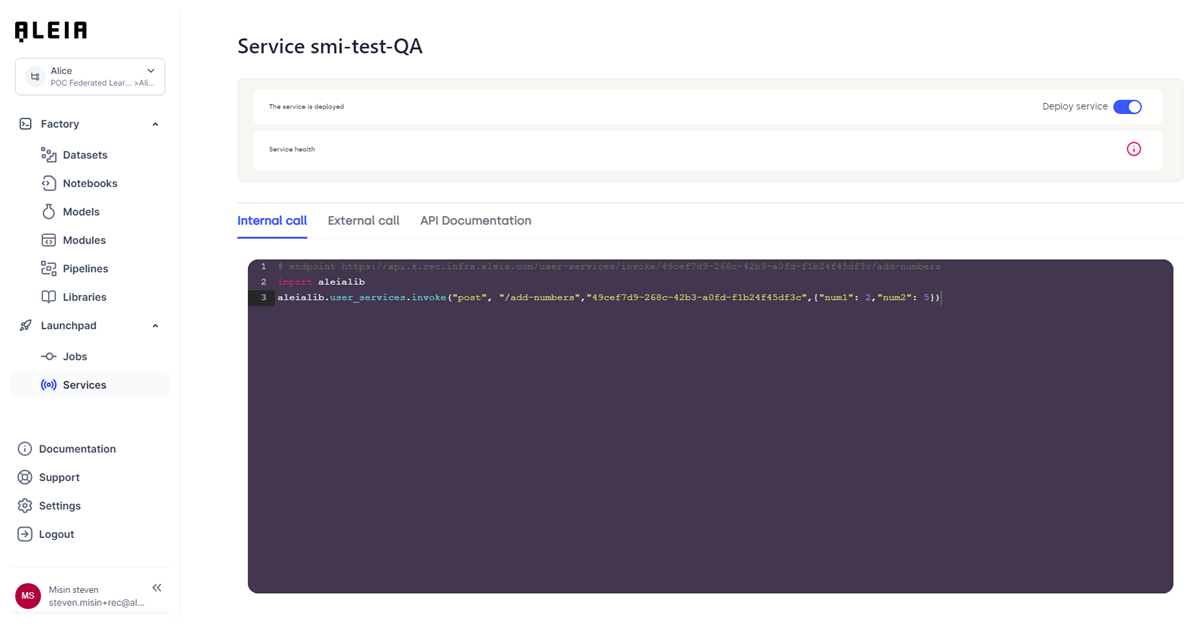
Code example:
import aleialib
aleialib.user_services.invoke("post", "/add-numbers","<service id>",{"num1": 2,"num2": 5})
From outside the platform using standards AWS token authentication (token that you will have to manage through your account):
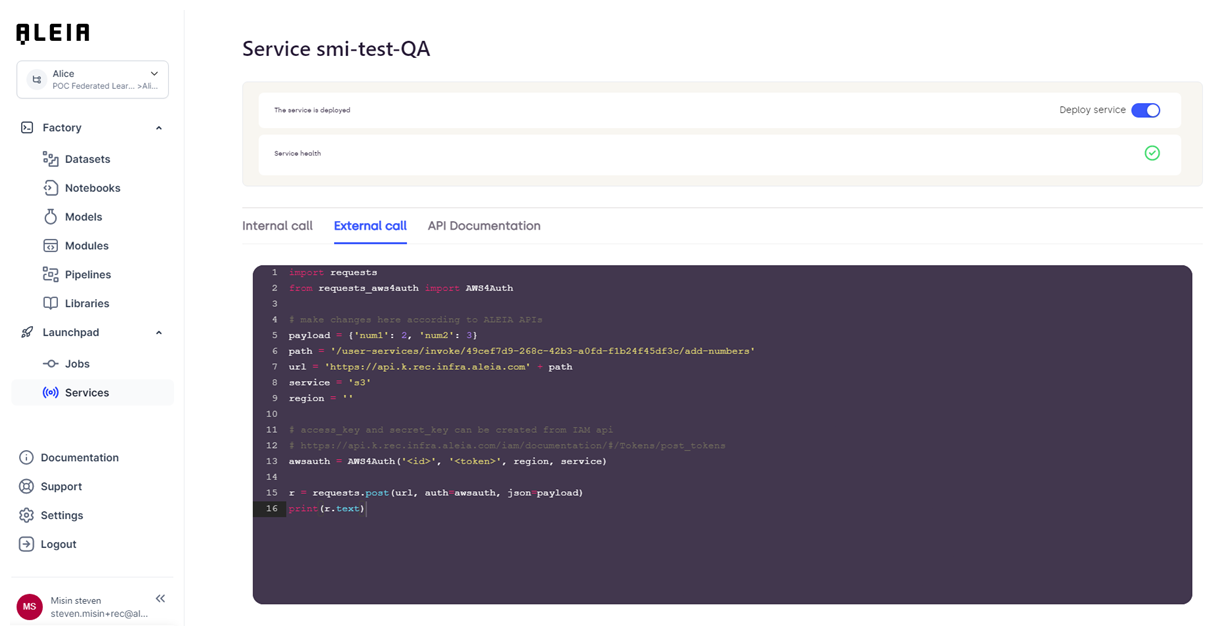
Code example:
import requests
from requests_aws4auth import AWS4Auth

# make changes here according to Allonia APIs
payload = {'num1': 2, 'num2': 3}
path = '/user-services/invoke/<service id>/add-numbers'
url = 'https://api.k.prod.infra.aleia.com' + path
service = 's3'
region = ''

# access_key and secret_key can be created from IAM api
# https://api.k.prod.infra.aleia.com/iam/documentation/#/Tokens/post_tokens
awsauth = AWS4Auth('<id>', '<token>', region, service)

r = requests.post(url, auth=awsauth, json=payload)
print(r.text)
Keep in mind that these informations are examples, so beside the URL the other informations are not dynamically updated.
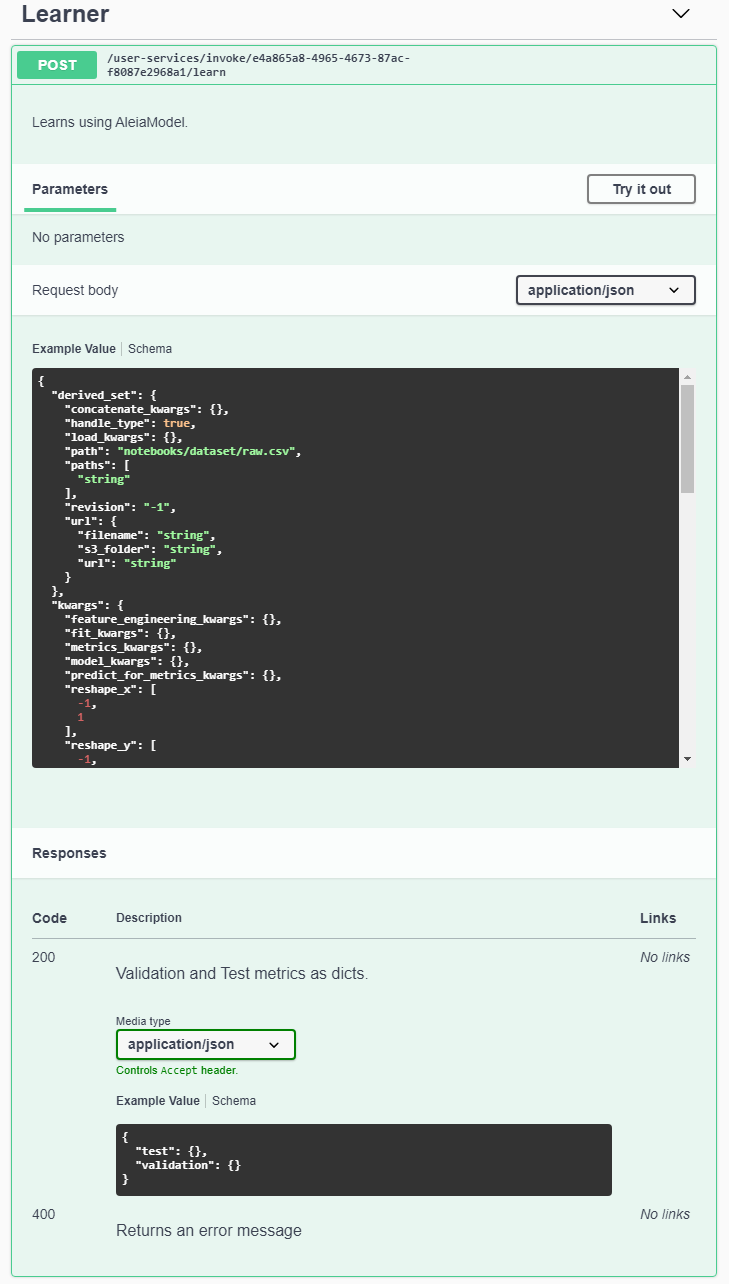
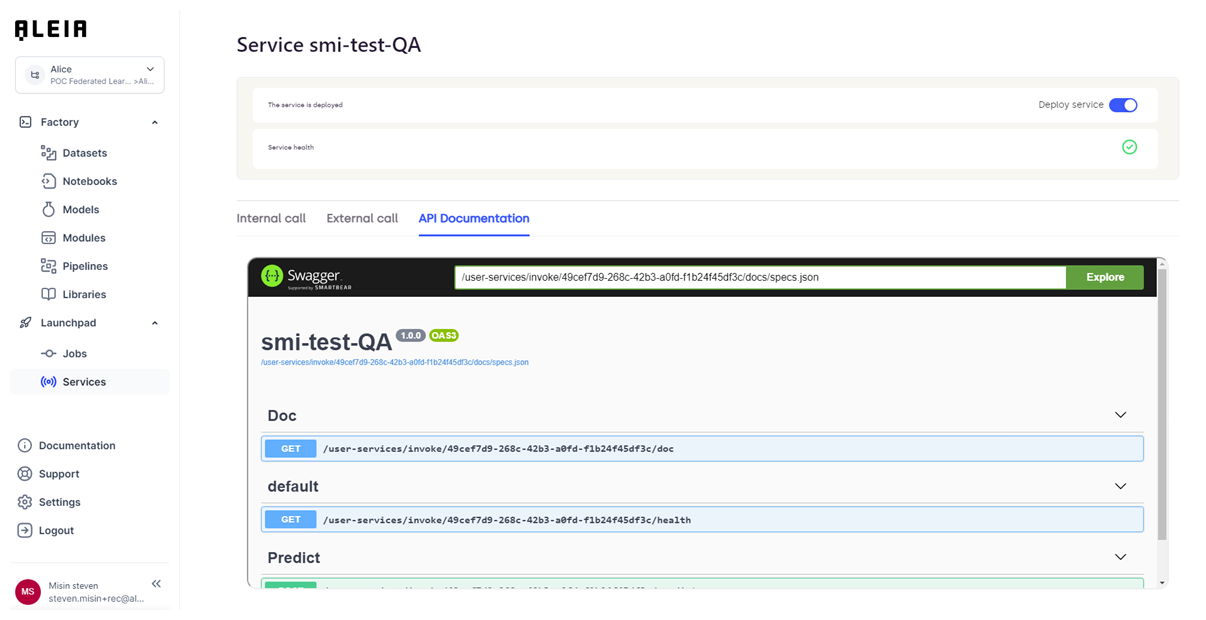
And last thing, you will be able to define & use the dedicated swagger documentation for the API by editing the custom-service code.
Custom-service example:
# routes to be written by users
@user_services_routes.route("/learn", methods=["POST"])
def learn():
    """Learns using AleiaModel. (1)

    One can specify which model to use, with which version, the data to learn on
    and which kwargs should be given to the prediction pipeline.

    Using this route instead of learning in a notebook is handy for heavy models
    whose learning takes hours. You can then use your notebook for something
    else while other pods are dedicated to your model's learning. Use a
    healt check of your model in the notebook though, to make sure the pipeline
    is correct.

    ---
    post:
      tags: (2)
        - Learner
      description: Learns using AleiaModel. (3)
      requestBody:
        content: (4)
          application/json:
            schema:
              type: object
              properties:
                model_name:
                  type: string
                  required: true
                raw_set:
                  $ref: '#/components/schemas/AleiaModelPathDescription'
                derived_set:
                  $ref: '#/components/schemas/AleiaModelPathDescription'
                train_set:
                  $ref: '#/components/schemas/AleiaModelPathDescription'
                validation_set:
                  $ref: '#/components/schemas/AleiaModelPathDescription'
                test_set:
                  $ref: '#/components/schemas/AleiaModelPathDescription'
                revision:
                  type: integer
                  required: false
                  example: -1
                  default: -1
                  description: 0 is invalid, None or -1 is the latest revision.
                kwargs:
                  type: object
                  required: false
                  properties:
                    reshape_x:
                      type: array
                      required: false
                      items:
                        type: integer
                      example: [-1, 1]
                    reshape_y:
                      type: array
                      required: false
                      items:
                        type: integer
                      example: [-1, 1]
                    model_kwargs:
                      type: object
                      required: false
                    feature_engineering_kwargs:
                      type: object
                      required: false
                    train_val_test_split_kwargs:
                      type: object
                      required: false
                    fit_kwargs:
                      type: object
                      required: false
                    predict_for_metrics_kwargs:
                      type: object
                      required: false
                    metrics_kwargs:
                      type: object
                      required: false
                save:
                  type: boolean
                  default: true
                  required: false

      responses: (5)
        200:
          description: Validation and Test metrics as dicts.
          content:
            application/json:
              schema:
                type: object
                properties:
                  validation:
                    type: object
                  test:
                    type: object

        400:
          description: Returns an error message
    """
    model, request_json, save = get_model()
    for path_name in request_json:
        if not path_name.endswith("_set"):
            continue
        handle_path(model, path_name, request_json)

    metrics = model.learn(**request_json.get("kwargs", {}))

    if save:
        model.save()
    model.close()

    return make_response({"validation": metrics[0], "test": metrics[1]})
Details:
| 1 | Plain description of the service. It will not be displayed on the Swagger page. |
| 2 | Tag given to the endpoint. It will let you organize all your endpoints by given category. |
| 3 | Description of the endpoint. It will displayed on the Swagger page. |
| 4 | Parameters content to be provided to the endpoint. It will let you describe the full schema that need to be used to call the endpoint. |
| 5 | Responses available for the given endpoint and schema description. |
Results of code example:
|
When editing the swagger documentation of your API, you need to respect the swagger format as provided by the official Swagger documentation. |
All updates will be made available on the dedicated "API documentation" panel when the service will be redeployed:
|